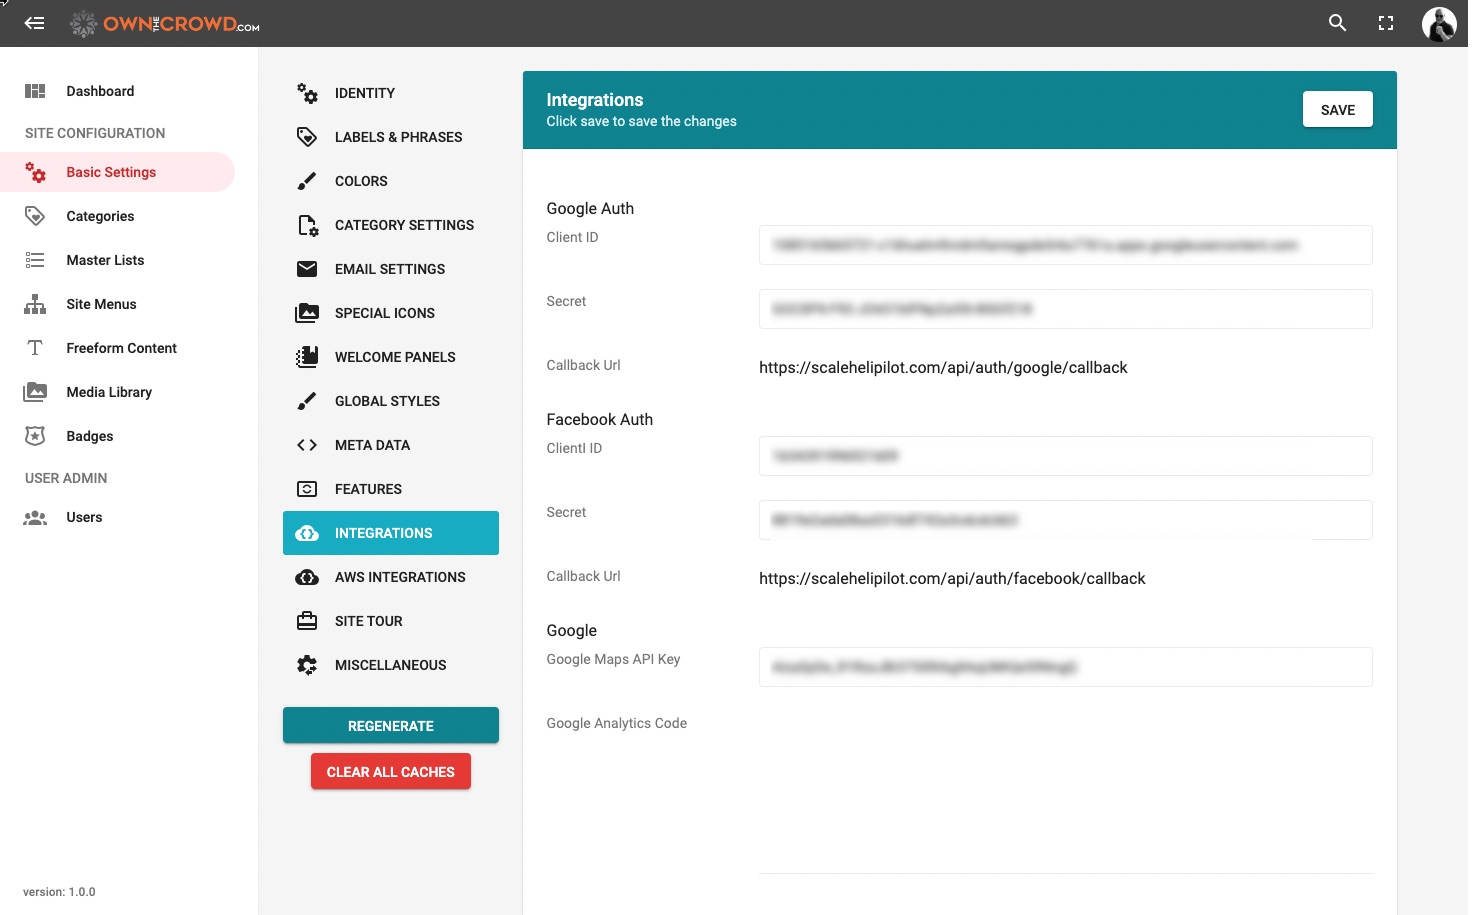
To enable users to sign up or sign in through their Google account, set up your Oauth by visiting: https://console.developers.google.com.
Next, create a new project.

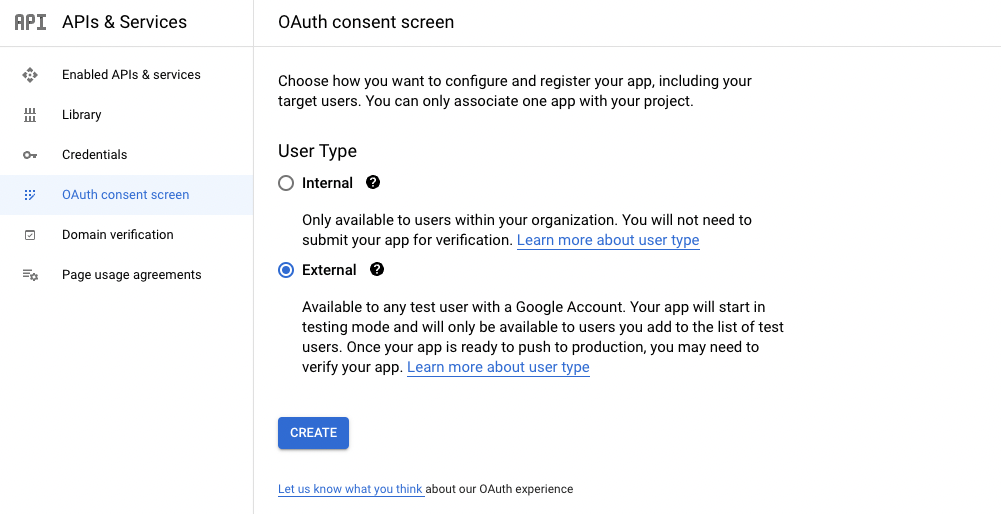
Next, you will create an OAuth consent screen. Our application does NOT require any personal information from Google so you will not have to verify your account.
CHOOSE "EXTERNAL" and then click the CREATE button.
Next, complete the information screen.
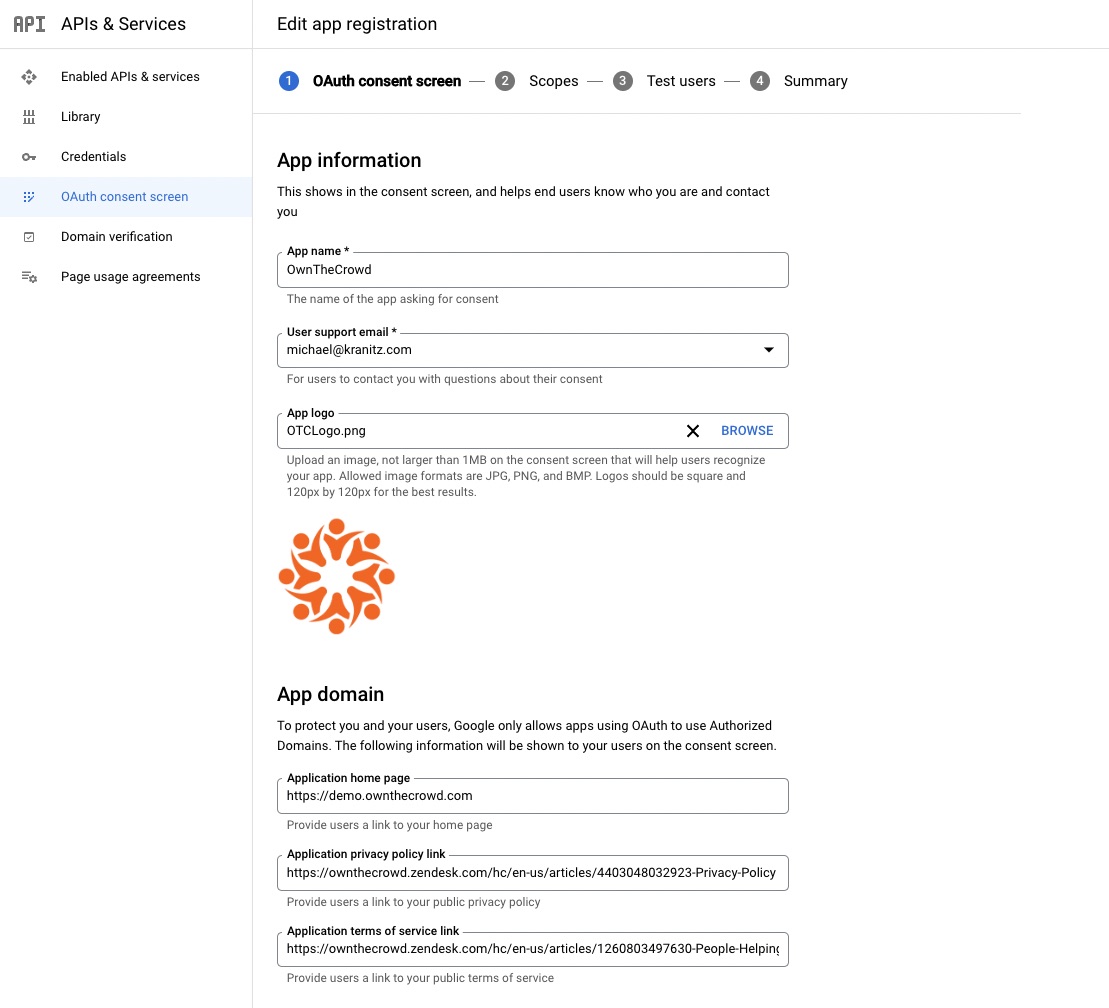
For your PRIVACY POLICY and TERMS OF SERVICE link, go to the HELP section of your site and find each article. Copy the URL and simply paste it in. You have control over the help area of your site and, in turn, the policies you publish there.
You may SKIP the next two screens and RETURN TO THE DASHBOARD. Click CREDENTIALS on the left and select "Create Credentials > OAuth client ID" from the menu.
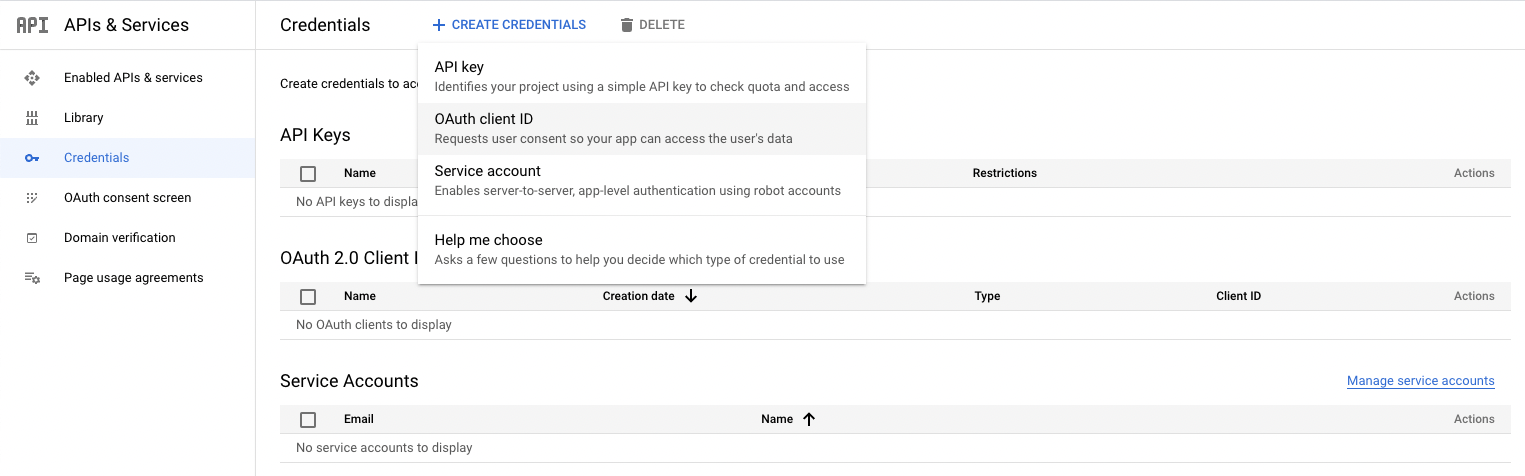
When prompted, choose:
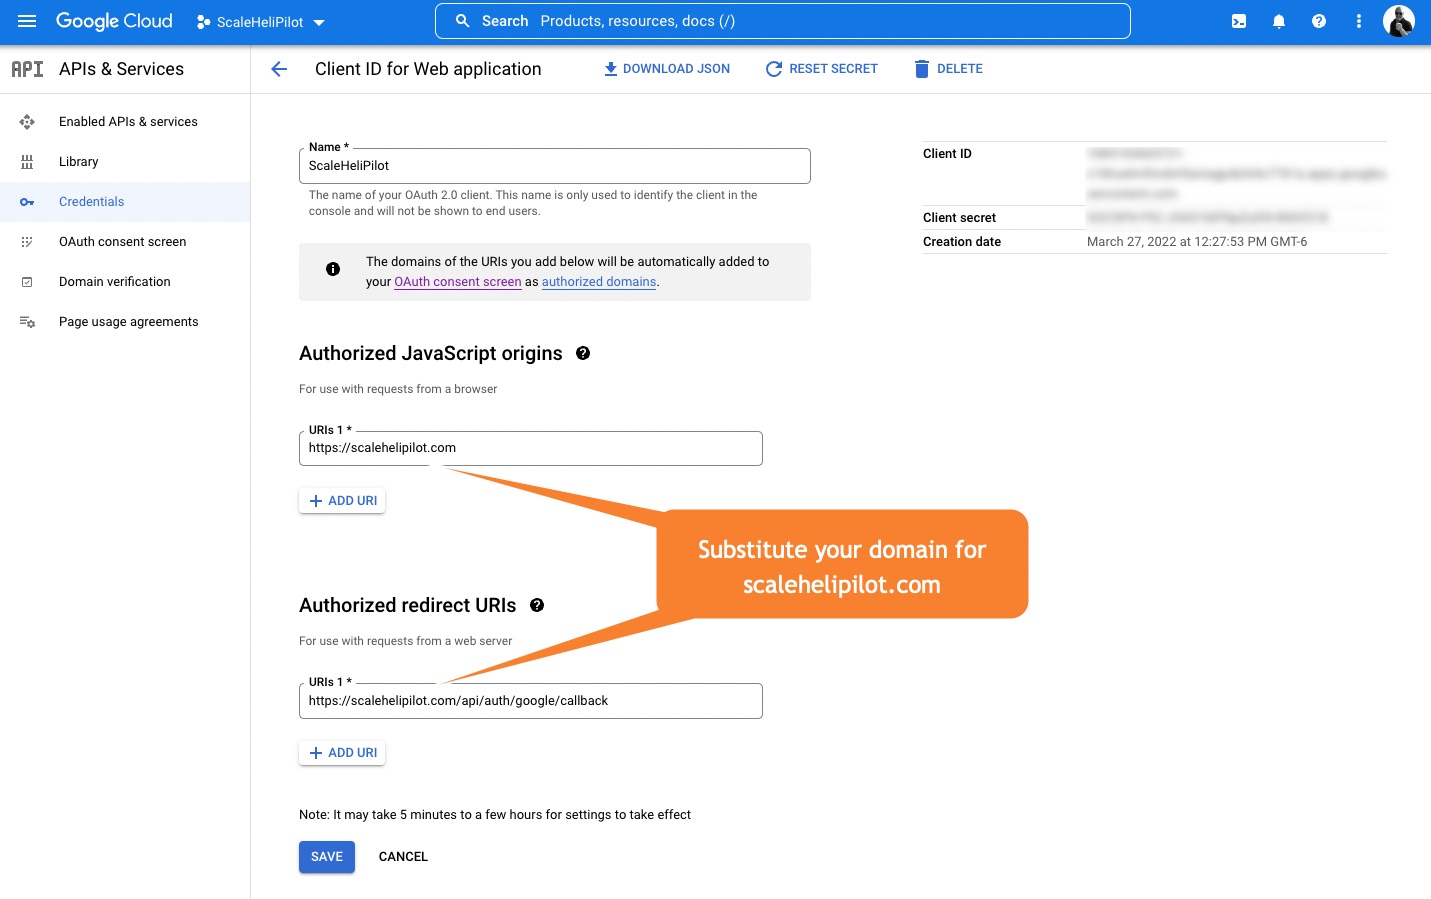
- Web application as the Application type.
- Your site name as the name.
- Enter your site URL under "Authorized JavaScript origins" you must use "https://domainname.xxx" and may optionally add another with "https://www.domainname.xxx"
Simply copy your client ID and secret from the pop-up panel.
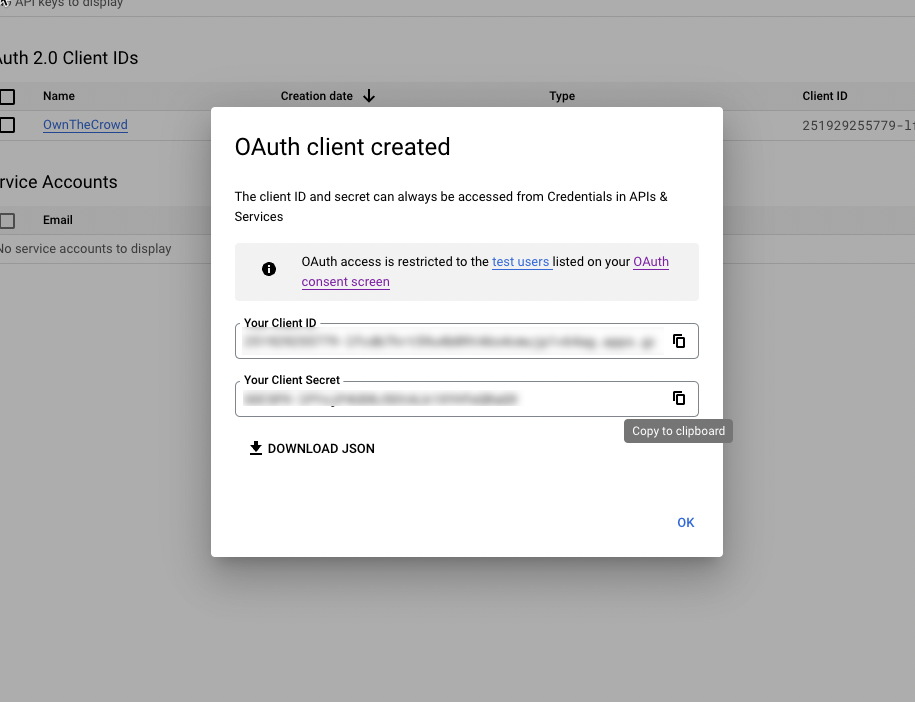
Return to the OwnTheCrowd admin area and enter the INTEGRATIONS area and paste in the keys.